The table is a record of figuring the spherical mirror surface to a parabolic surface.
| No. |
Stroke |
Time (Min.) |
Comments |
Testing Results |
| 1 |
4/5 W |
10 |
Started with 1/3 W strokes to warm up the lap. Then spent about 8 minutes with wide strokes as opposite. Heard a few high pitched squeals halfway through polishing, so misted down the lap and it stopped. Another few squeals towards the end of the session. Polishing solution frothed up. |
Used Everest's pin method to measure surface shape, using 3 pins across radius. Charted data indicating roughly 3/2 to go, see for graph. CoC=1333.5mm.
|
| 2 |
4/5 W |
10 |
Carried out strokes as opposite. No squealing. Guess this was due to cold pressing using only detergent before the above. |
No difference in measurements at the various pins, i.e. surface reverted back to a spheroid, CoC unchanged at 1332.5mm. Guess that carried out to many up/down strokes as crossed the mirror in above, or tool/mirror not properly pressed. |
| 3 |
4/5 W |
10 |
Re-charged with polishing mixture and cold pressed after 5 minutes, then completed the 10 minute polishing period. |
This produced a hole in the mirror centre about .042" deep with flat edges. This resulted from the polishing strokes being to long. See graph. CoC=1333.5mm. |
| 4 |
1/3 Chord |
4 |
With tool on top and edge at about the crest of hole carried out short vertical strokes gradually working the tool edge to the mirror edge. Drag not constant during polishing in some directions, perhaps not pressed well enough. |
The hole had extended slightly towards the edge the mirror. Since there is a long way to achieving a paraboloidal shape decided to repeat the above with mirror on top. See graph |
| 5 |
1/3 Chord |
6 |
With mirror on top and edge of tool at about the crest of hole carried out short vertical strokes gradually working the tool edge to the mirror edge. Stopped when a pitch square came loss. |
Could just distinguish a difference between the outer pins, therefore using a 5 pin scale to take Foucault measurements. These showed that the central hole was extending to the edges.See graph |
| 6 |
1/2 Chord |
8 to 10 |
Mirror on top and edge of tool at about the crest of hole carried out short vertical strokes gradually working the tool edge to the mirror edge. Ended by using a standard parabolising stoke. |
Hole largely gone, but edges still slightly flat. Continue with current polishing stroke. See graph |
| 7 |
1/2 Chord |
10 |
Mirror on top. Polished with standard paraboloid stoke, i.e. taking mirror centre to 1" from tool edge. |
Surface moving towards a paraboloid shape, although do not seem to have deepened the central area. Why? frequency of stokes on the central area were to great, there should be a greater frequency with the mirror centre near the tool edges.See graph |
| 8 |
4/5 Chord |
10 |
Mirror on top. Polished with standard paraboloid stoke, i.e. taking mirror centre to 1" from tool edge with more strokes with the mirror centre near the tool edge. |
Significant progress, although the mirror edge levels off a bit. So concentrate as above on the mirror centre, but also 1" to 2" out from the mirror centre to steepen the pins 3 & 4. See graph |
| 9 |
4/5 Chord |
11 |
As above, concentrating polishing either side of mirror centre. Note stuck a small piece of masking tape at the centre of mirror back, this made judging stroke length and position easier. |
Bit of a hollow at pin 2 and edge areas still slightly flatted off See graph. Try deepening the centre and 1/2" to 1" in from the mirror edge.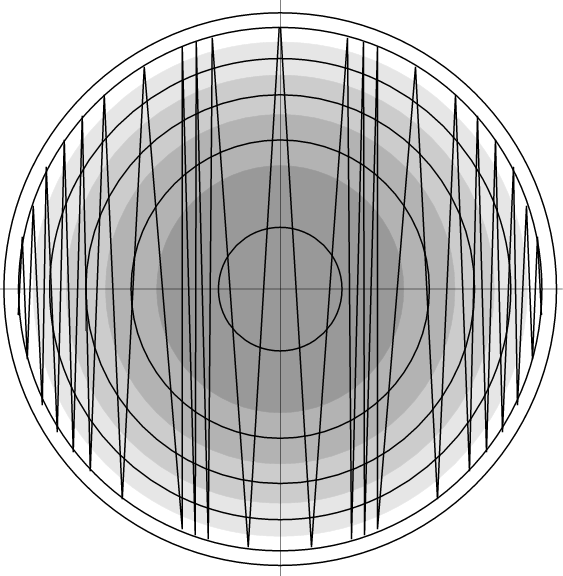 |
| 10 |
4/5 Chord |
12 |
Carried out the above polishing with mirror on top. |
Tested with 5 pins then 7 pins since very closed to final shape. Area from pins 3 to 5 reduced by 0.003". |
| 11 |
4/5 Chord |
3.5 |
Mirror on top and strokes as diagram. 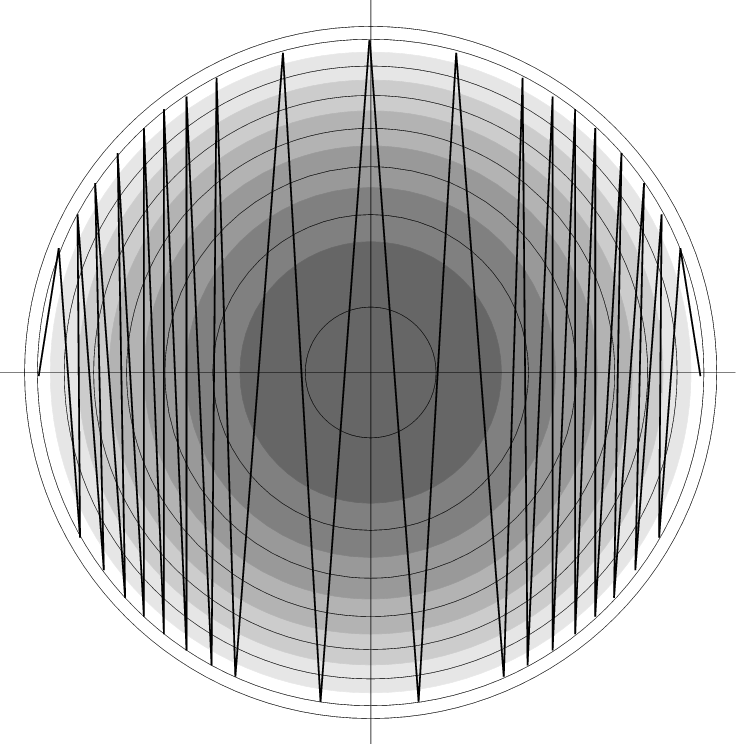 |
High area extended. Did not concentrate polishing in the correct areas relative to diagram. |
| 12 |
4/5 Chord |
4.5 |
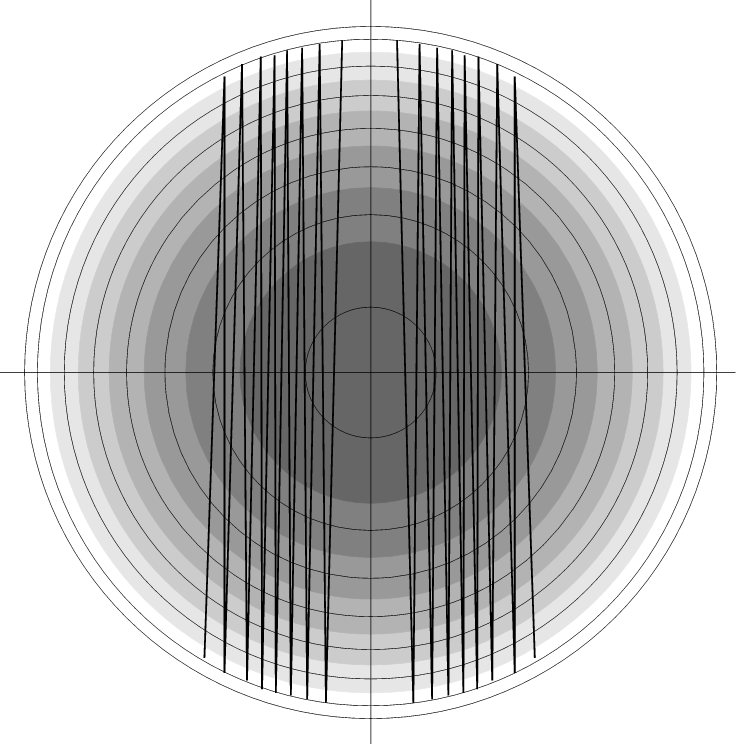 Mirror on top and strokes as diagram. Initially carried out polishing strokes in an area 1" wide either side on tool/mirror centre (once round the stand). Then polished the whole mirror while concentrating strokes in the areas previously mentioned to blend in the high points with the rest of the mirror surface. Mirror on top and strokes as diagram. Initially carried out polishing strokes in an area 1" wide either side on tool/mirror centre (once round the stand). Then polished the whole mirror while concentrating strokes in the areas previously mentioned to blend in the high points with the rest of the mirror surface. |
Hill reduced by 50%, but of mirror polished to far at its edge, i.e. now a hollow at the outer pin. |
| 13 |
4/5 Chord |
5.5 |
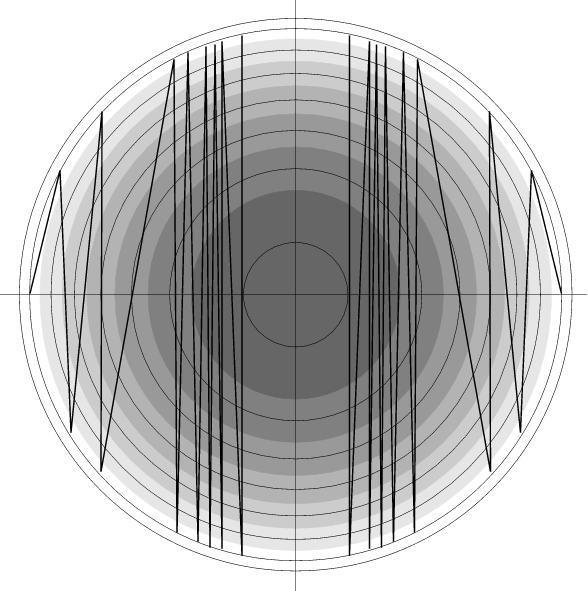 Mirror on top. Lined up the polishing plan opposite with actual tool to gauge where to concentrate the polishing. Mirror on top. Lined up the polishing plan opposite with actual tool to gauge where to concentrate the polishing. |
Error profile reverted back to 10 above. Collated errors relative to the theoretical paraboloid shape and found they are all of a similar form. 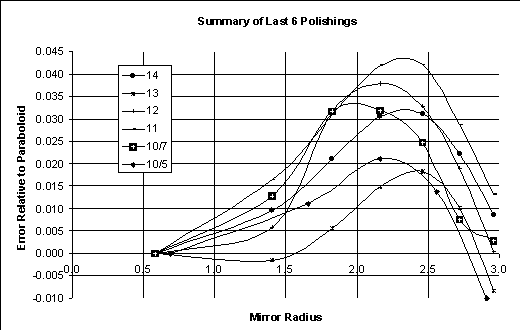 |
| 14 |
1/4 Chord |
Once round the stand |
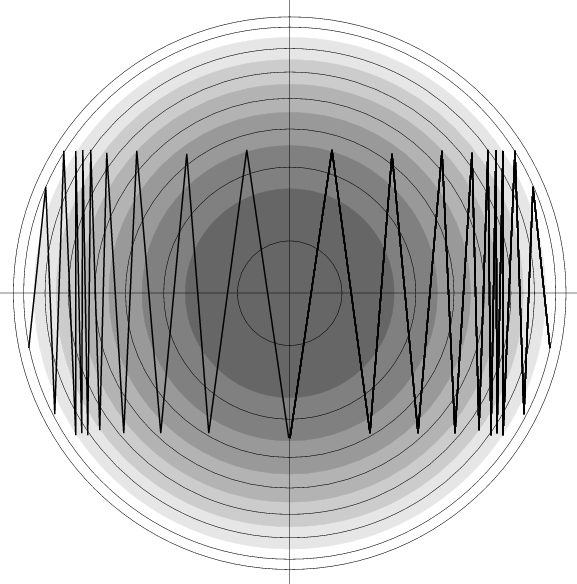 Tool on top pressing down on edge to concentrate polishing action between points 3 and 4. Note ackward to move tool over mirror. Tool on top pressing down on edge to concentrate polishing action between points 3 and 4. Note ackward to move tool over mirror. |
This worked hill flattened off by a 1/3 of it's height. Try with tool on top. |
| 15 |
1/4 Chord |
7 |
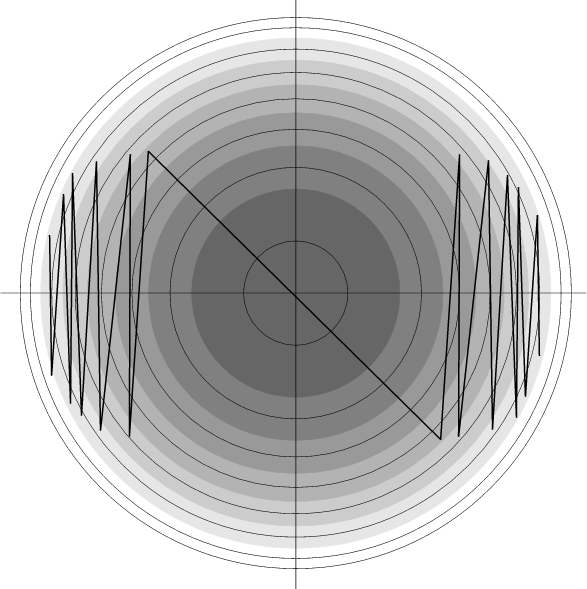 With tool on top polished with mirror centre following opposite plan and pressing on over hanging mirror edge to concentrate polishing at zones 3, 4, 5, and 6. With tool on top polished with mirror centre following opposite plan and pressing on over hanging mirror edge to concentrate polishing at zones 3, 4, 5, and 6. |
Hill reduce by about half but edge in zone 2 are slight valleys. Plan not correct it shows where the mirror edge should travel not the centre. Adding additional info on plan helped resolve this. Surface getting very close to the ideal, see graph |
| 16 |
1/4 Chord |
6.5 |
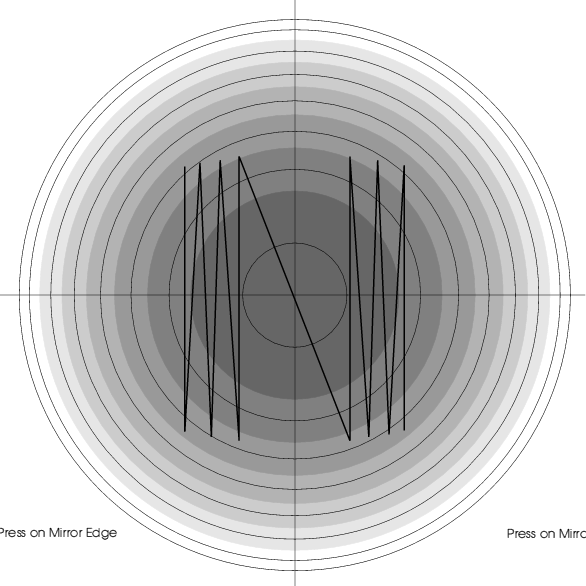 Applied polishing plan opposite pressing down slightly on the overhanging mirror edge to concentrate polishing in zones 3, 4, and 5. Applied polishing plan opposite pressing down slightly on the overhanging mirror edge to concentrate polishing in zones 3, 4, and 5. |
Reverted back to mirror profile 13 above. This may be because of testing the mirror in a different orientation than previously, or the polishing plan is rubbish, in which case I don't know what I'm doing. The graph indicates the material removed between this and the previous polish. This shows that material must have been added, impossible, therefore orientation of the mirror during testing is the issue. That is the mirror is not evenly polished. |
| 17 |
1/4 Chord |
5 |
Did not record details of the polishing process at this stage. From memory generated a polishing pattern with mirror on top. Exerted additional pressure on the edge of the mirror to concentrate polishing in specific zones of the mirror, but can remember which. |
Tested mirror a number of times, rotating it by 45 degrees between each test. This showed that there is part of the mirror with a hollow at the 135 degree position. Other positions are roughly correct to the idea. See graph |
| 18 |
Chord |
|
|
|
